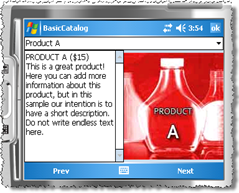
In a previous post I included a very simple application called "BasicCatalog" intended for showing one case of having more than one file with the same name on your deploy.
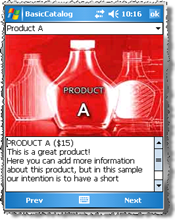
One of the problems of that PocketPC application is the lack of smart screen rotation awareness. Actually, if you rotate the Pocket PC emulator screen using the originally provided source code you'll see something like this:
As well as this layout still showing the picture, the description is almost invisible. We definitely can improve it having a better screen distribution for landscape screen orientation.
We'll use the Clarius Orientation Aware Control Community Edition, which can be downloaded for free. It includes support for creating a completely new layout at design time for landscape and portrait orientations within visual studio 2008 (and VS2005) designer.
This is a very detailed walk-through. You can follow it and do it very quickly in spite of this could look as a very long post ;)
For better understanding, I divided the article in the following steps:
- Adding a new Orientation Aware Control to our project
- Moving our original form design to the new OAC
- Moving Form functionality to the new OAC
- Adding an OAC instance to the existing form
- Designing the horizontal layout
Please start downloading the original source code from this link, it will be our starting point for the whole work. We'll need the Community Edition of the Clarius Orientation Aware Control installed. If you already have any of the Clarius Orientation Aware Control 2008 editions installed, this preparation step is not needed, go straight to step 1:
1) Adding a new Orientation Aware Control to our project
Lets start creating a new Orientation Aware Control:
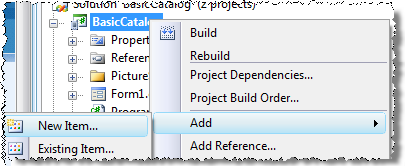
Right click on BasicCatalog project - Add - New Item...
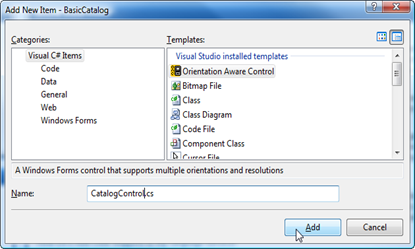
Select the Orientation Aware Control template, and enter "CatalogControl.cs" in the "Name" field. Press "Add".
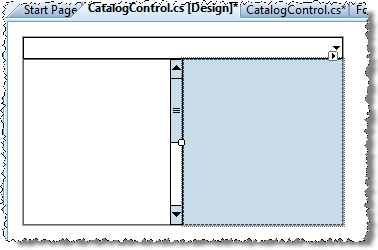
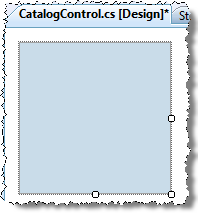 A new CatalogControl.cs [Design] tab will appear on Visual Studio. This canvas should be used as the new design surface for our form.
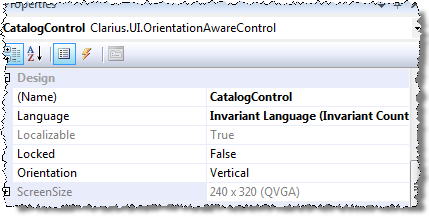
If you take a look at the Properties panel for this control, you'll see a new Orientation property with "Vertical" value. There is another new property named ScreenSize which is read only in the Community Edition, fixed to 240x320(QVGA), the default form factor for Pocket PC. In other OAC editions (Professional and Trial) this property can be changed freely to design different layouts for each supported screen size.
2) Moving our original Form design to the new OAC
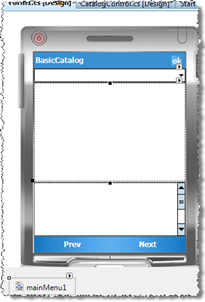
Let's move all the controls included in our Form to the new CatalogControl. Double click "Form1.cs" in Solution Explorer to open it in design mode.
Press CTRL+A to select all the controls in the form (or do it thru the Edit - Select All menu option). You'll get something like this:
Copy all of them (CTRL + C), switch to "CatalogControl.cs [Design]" and paste (CTRL + V).
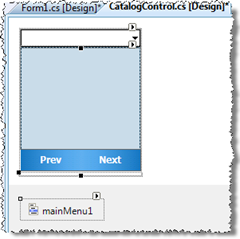
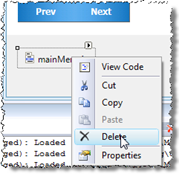
Please select "mainMenu1" from the bottom bar and delete it (Delete key or right click - Delete). The menu shouldn't be in CatalogControl anymore.
Select BasicCatalog from the Properties pane combo box and set the size to 240x268 (The regular OAC size for QVGA portrait).
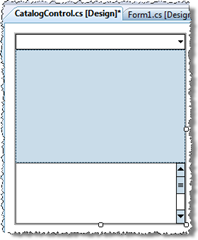
We've already moved our layout to BasicCatalog. Now, our design should look like this:
3) Moving Form functionality to the new OAC
As this is a sample application for demo purposes only, it has all its basic logic defined in the Form source code. Actually, this used to be a very common scenario in mobile applications. Now we need to move all the functionality from the form source code to the CatalogControl source code, except for the menu related which will still being handled by the form.
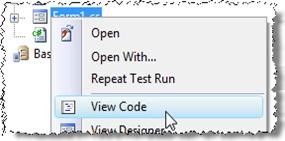
So, let's start preparing CatalogControl. 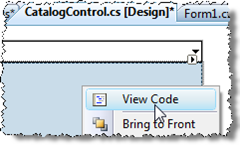 Open CatalogControl.cs source code doing right click on the control and selecting View Code.
Remove all the three methods after the CatalogControl() constructor. The sourcecode should look as the following:
using System;
using System.Collections.Generic;
using System.ComponentModel;
using System.Drawing;
using System.Data;
using System.Text;
using System.Windows.Forms;
using Clarius.UI;

namespace MobilePractices.BasicCatalog
{
   public partial class CatalogControl : OrientationAwareControl
   {
       public CatalogControl()
       {
           InitializeComponent();
       }
   }
}
Now, open the Form1.cs code: from Solution Explorer right click on Form1.cs - "View code".
Select from line 28 (private void FillComboBox()) to line 128 (up to the end of comboBox1_SelectedIndexChanged) and cut all the selected code (CTRL + X). Go back to CatalogControl.cs source code, and paste the code after the default constructor within the class (CTRL + V).
Additionally, we need to move the following using clauses:
using System.IO;and the class member "pictures" which should be now part of the CatalogControl class
using System.Reflection;
List<ShowableDirectory> pictures = new List<ShowableDirectory>();
BuildCollection() and FillComboBox() method calls should be removed from the Form1 constructor and placed as part of a new override OnLoad method in CatalogControl:
protected override void OnLoad(EventArgs e)
{
   base.OnLoad(e);
   BuildCollection();
   FillComboBox();
}
Now it's time to move the menu item click handlers functionality from Form1 to CatalogControl. Both handlers will be now internal functions with no parameters (because in this application they don't need any parameter as part of their logic).
Copy (do not cut) and paste menuItem1_Click and menuItem2_Click into CatalogControl and replace their parameters, names and modifiers to look as following:
internal void SelectPrev()
{
   if (comboBox1.SelectedIndex > 0)
       comboBox1.SelectedIndex -= 1;
}

internal void SelectNext()
{
   if (comboBox1.SelectedIndex < (comboBox1.Items.Count - 1))
       comboBox1.SelectedIndex++;
}
These methods will be called from the form menu item click handlers, so we need to make them accessible from the form turning them "internal" instead of "private".
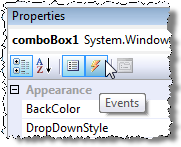 Finally, we need to wire up the selected index changed handler from CatalogControl to the corresponding event in the combo box. Go back to CatalogControl designer, select comboBox1 and press the "Events" button:
In "SelectedIndexChanged" select from the drop down list "comboBox1_SelectedIndexChanged" as following:
Save all the files (CTRL + SHIFT + S).
4) Adding an OAC instance to the existing form
To add CatalogControl to the existing form, we need to have it as part of the toolbox. To get it there, just build the solution. Menu Build - Build Solution.
The build should succeed with no errors. If you have any error please check the previous steps to find out what could be different.
Open Form1 in design mode (double click on Form1.cs in Solution Explorer). Remove comboBox1, textBox1 and pictureBox1 from the form (those three controls have been copied to CatalogControl during step 2).
Drag the CatalogControl from "BasicCatalog Components" in the ToolBox to the form:
The new control is called CatalogControl1 by default, and that's good enough for our sample. Click on the smart tasks icon at the top right of CatalogControl1 and select Dock in parent container.
This step is required for allowing OAC to detect screen size changes.
Go to the source code, and replace menuItem1_Click and menuItem2_Click with the following:
private void menuItem1_Click(object sender, EventArgs e)
{
   catalogControl1.SelectPrev();
}

private void menuItem2_Click(object sender, EventArgs e)
{
   catalogControl1.SelectNext();
}
Now the handlers in the form are just calling the correspond SelectPrev() or SelectNext() methods in CatalogControl.
We're ready to see the app running! Press F5 ...
The app should behaves in exactly the same way it used to do before all our changes, even with the same disappointing horizontal layout design. Frustrating? no way!... we've just included an OAC in our app so we can now easily build a better horizontal layout.
5) Designing the horizontal layout
Close the application if it still running pressing the OK button.
In Visual Studio, open CatalogControl in design mode by double clicking on it in Solution Explorer.
Be sure that you have CatalogControl selected, if needed please select it from the Properties pane combo box.
We need to rotate the screen, just Right click on any empty area of the designer and select "Rotate".
There are several ways to rotate an OAC, you can also change the "Orientation" property from the Properties pane to "Horizontal" or using the "Rotate" command:
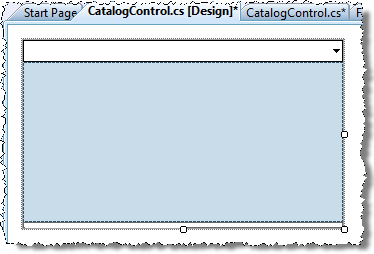
The designer will change to the "Horizontal" Layout. First thing to do is to change the CatalogControl size to 320x188.
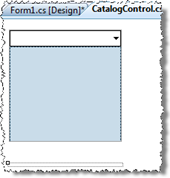
The layout looks as in the app when running in a horizontal screen. This is our starting point.
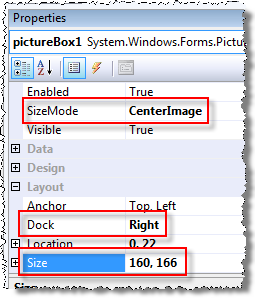
Select pictureBox1 and change the Docking property to Right, sizeMode to CenterImage and Size to 160,166 as follows:
The layout looks now much better:
And that's it! The work is done! Try running the app by pressing F5.
Now you'll see the following behavior when rotating the screen:
It's much better! isn't it?
You can download the final source code after completing the four steps from here:
Some extra tips:
 You can rotate the emulator using the "Calendar" button at the right of the directional pad.
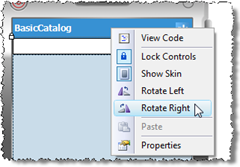 You can rotate a Form at design time, from a contextual menu in the Visual Studio designer if you right click on the title bar and select Rotate left or Right. Sometimes this menu fails while showing. In that case you just need to close the form designer and open it again. If your form contains an Orientation Aware Control, it will reflect the orientation change according to the rotation.





2 comments:
Hi,
I have a Problem. After adding an Orientation Aware Control data, there comes an Error :
The Culture (Default) can not be converted in a CultureInfo-Object on this computer.
How to handle this?
I use VisualStudio2005
It looks like a failed installation issue.
Can you please add it to the Clarius Orientation Aware Control Forum for follow up?
What do you exactly mean with "adding OAC data"? Adding a child control into the CatalogControl or adding the CatalogControl to the form?
We'll also need some extra environment info like the version and edition of OAC you are using, the OS version, VS version (i.e.VS2005 SP1), and the OS language.
It would be also useful to know if you can launch some of the samples provided with the installation.
Thanks!
Post a Comment