Sunday, October 26, 2008

Setup.dll Sample and Walkthrough: Terms & Conditions / End User License Agreement for a Smart Device CAB installer

Visual Studio Smart Device CAB projects are extremely helpful in many ways for building a cab installer, even thought they have some pending issues, like a more natural MSBUILD integration, they allow us to have a cleaner and dynamic definition of our mobile app installation based on our source projects instead of relying just in binary and .inf files.

Sometimes we need to perform some custom actions before and after the installation or uninstallation. Typically we can need to check for pre requisites or show a Terms & Conditions/EULA before the installation and continue only if the user accepts it or, as another example, we can need to remove temporary files and registry entries after uninstallation.

In this post I want to show you a very simple way to implement a Setup.dll which shows a Terms & Conditions dialog which requires the explicit user acceptance to continue the installation.

What we need to start?

We'll use Visual Studio 2008 but this procedure also works with VS2005. You'll need Visual C++ and Smart Devices support installed.

I recommend you to take a look at this article in MSDN regarding Setup.dll files for better context.

Choose any of your mobile applications (or create a new empty one) and create a new Smart Device Cab project for it, as I describe in this post. Once you got it, we're ready to start.

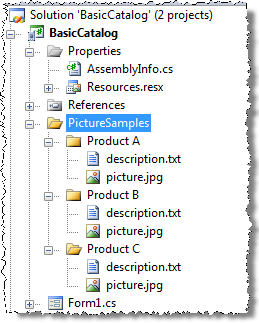
I'll use a port of SplashScreenSample for VS2008. For instance, my solution explorer looks like this:

image

Creating a new Setup.dll

First thing to do is to create a new Visual C++ Smart Device DLL project. Right click on the solution and select "Add" - "New Project".

The "Add New Project" dialog will pop up. Please select Visual C++ / Smart Device in "Project types" and use the "Win32 Smart Device Project" template.

I'll call it "EULASetup". Once you've entered the name just press "OK".image

Nice... and now it's wizard time. Let's follow the "Win32 Smart Device Project Wizard"

image

Select the platform corresponding to your project. In this particular sample I'm targeting Windows Mobile 6 Standard:

image

As we want to implement a very simple DLL, just select "DLL" as Application Type and don't check anything else ("Precompiled headers" cannot be modified so let them checked).

image

Once we press "Finish" the wizard will create a new native C++ project in our Solution. The new project should look like this:

image

Showing the EULA dialog at installation begin

If it's not already open, please open EULASetup.cpp by double clicking on it. This class currently contains the DLLMain entry point for the library. We actually don't need this function in our setup.dll so this function can be removed.

What we need is to implement a function to be called when the user tries to install the cab. This function is Install_Init. In this function we'll show the terms & conditions for our application installation and according with the user response we can continue the installation or cancel it.

Our code needs to include "ce_setup.h" to get the required knowledge of Install_Init signature types, in this sample codeINSTALL_INIT, an enumeration which gives us the two possible result values: codeINSTALL_INIT_CONTINUE or codeINSTALL_INIT_CANCEL.

For simplicity, we can put the text in a string directly hardcoded within the source. I'm calling it "Message". Install_Init will show the message using the MessageBox API, and handling a "Yes" response continuing with the installation or a negative response canceling it.

It's important to remark that Install_Init may be called more than once, with different values for the installation directory; for example when the current directory doesn't have enough room. So we need to handle the fFirstCall parameter value to only show the dialog the first time our function is called.

How looks our code? please replace the entire content of EULASetup.cpp with the following:

#include "stdafx.h"
#include "ce_setup.h"

// This is a variable containing the text to be displayed
// in the Terms & Conditions dialog

TCHAR Message[] = _T("TERMS & CONDITIONS\r\n ")
_T("Selecting YES you're accepting our terms & conditions.\r\n")
_T("This is just a sample application.\r\n")
_T("From http://www.mobilepractices.com\r\n")
_T("You can replace this text with your own.\r\n")
_T("We're using a setup.dll to show this dialog.\r\n")
_T("Extra line to force vertical scrollbar.\r\n")
_T("Last line.\r\n")
;

// This function will be called when the user
// tries to install the cab. According to its return
// value the installation continues or is cancelled.
// As this could be called more than once
// (i.e. if there is not enough space on the target)
// we should take care about fFirstCall parameter
// to show the dialog only once.

codeINSTALL_INIT Install_Init( HWND hwndParent,
BOOL fFirstCall,
BOOL fPreviouslyInstalled,
LPCTSTR pszInstallDir )
{
if (!fFirstCall

::MessageBoxW(0, Message,
_T("SplashScreenSample")
, MB_YESNO) == IDYES)
return codeINSTALL_INIT_CONTINUE;
else
return
codeINSTALL_INIT_CANCEL;
}


Exporting Install_Init function using a .DEF file

As our Install_Init function should be visibly externally to allow WCELOAD.EXE to call it during the .cab file processing; it means that we need to export it, and in this sample we'll use a .def file for doing it.

Please, press right click on EULASetup (the project) and select Add - New Item...

image

Please select "Module-Definition File (.def)" and enter "EULASetup" as its name. Press "Add".

A new "EULASetup.dll" is included in your project. If it's not already open in the editor, please open it and replace the body with the following:

LIBRARY    "EULASetup"
EXPORTS
Install_Init @1

In this .def file we're just exporting Install_Init. Save the changes and build it. No errors should be found.

Adding the Setup.dll to our Smart Device CAB Project

Finally, we need to add "EULASetup.dll" as the setup.dll for our Smart Device CAB Project. This is really straightforward. Right click on the Installer project and "Add - Project Output..."

image

What we're doing is adding the output of build EULASetup to the installer. In fact, we're adding EULASetup.dll into the cab installer. The way to do it is selecting EULASetup as the project and "Primary Output" as what we want to include. Press "OK".

image

Now we have in our installer project the Primary Output from EULASetup.
image

The final step is to select it as the Setup.dll for our installer. Just select the Installer project by clicking on it
image

In the Properties pane for "CE Setup DLL" select (Browse...)
image

The Primary Output of a project is placed by default into the "Application Folder" of the CAB File System. So, in the following dialog please select "Application Folder" and press "OK" to open that folder
image

In the Application Folder select "Primary Output from EULASetup (Active)" and press "OK" again.
image

And... that's it! We've included EULASetup as the Setup DLL for our installer.

We're ready to rebuild the project and generate the .CAB File. Now when we try to install SplashSampleInstaller.CAB, we'll first get the following dialog:

image

If the user selects "No", the installation will be aborted. It will only continue if the user selects "Yes". I know the text could be improved a lot, and you even can use a more elaborated dialog, but... that's your homework!

Hope you like this walkthrough, and most important, it helps you. If you want to see the source code, just download it from the following link:

Wednesday, October 15, 2008

How to add Screen Rotation support to your app in .Net Compact Framework using OAC

In a previous post I included a very simple application called "BasicCatalog" intended for showing one case of having more than one file with the same name on your deploy.

One of the problems of that PocketPC application is the lack of smart screen rotation awareness. Actually, if you rotate the Pocket PC emulator screen using the originally provided source code you'll see something like this:

image image

As well as this layout still showing the picture, the description is almost invisible. We definitely can improve it having a better screen distribution for landscape screen orientation.

We'll use the Clarius Orientation Aware Control Community Edition, which can be downloaded for free. It includes support for creating a completely new layout at design time for landscape and portrait orientations within visual studio 2008 (and VS2005) designer.

This is a very detailed walk-through. You can follow it and do it very quickly in spite of this could look as a very long post ;)

For better understanding, I divided the article in the following steps:

  1. Adding a new Orientation Aware Control to our project
  2. Moving our original form design to the new OAC
  3. Moving Form functionality to the new OAC
  4. Adding an OAC instance to the existing form
  5. Designing the horizontal layout

Please start downloading the original source code from this link, it will be our starting point for the whole work. We'll need the Community Edition of the Clarius Orientation Aware Control installed. If you already have any of the Clarius Orientation Aware Control 2008 editions installed, this preparation step is not needed, go straight to step 1:

1) Adding a new Orientation Aware Control to our project

Lets start creating a new Orientation Aware Control:

image

Right click on BasicCatalog project - Add - New Item...

image

Select the Orientation Aware Control template, and enter "CatalogControl.cs" in the "Name" field. Press "Add".

imageA new CatalogControl.cs [Design] tab will appear on Visual Studio. This canvas should be used as the new design surface for our form.

If you take a look at the Properties panel for this control, you'll see a new Orientation property with "Vertical" value. There is another new property named ScreenSize which is read only in the Community Edition, fixed to 240x320(QVGA), the default form factor for Pocket PC. In other OAC editions (Professional and Trial) this property can be changed freely to design different layouts for each supported screen size.

image

2) Moving our original Form design to the new OAC

Let's move all the controls included in our Form to the new CatalogControl. Double click "Form1.cs" in Solution Explorer to open it in design mode.

Press CTRL+A to select all the controls in the form (or do it thru the Edit - Select All menu option). You'll get something like this:

image 

Copy all of them (CTRL + C), switch to "CatalogControl.cs [Design]" and paste (CTRL + V).

image

Please select "mainMenu1" from the bottom bar and delete it (Delete key or right click - Delete). The menu shouldn't be in CatalogControl anymore.

image image

image

Select BasicCatalog from the Properties pane combo box and set the size to 240x268 (The regular OAC size for QVGA portrait).

We've already moved our layout to BasicCatalog. Now, our design should look like this:

image

3) Moving Form functionality to the new OAC

As this is a sample application for demo purposes only, it has all its basic logic defined in the Form source code. Actually, this used to be a very common scenario in mobile applications. Now we need to move all the functionality from the form source code to the CatalogControl source code, except for the menu related which will still being handled by the form.

So, let's start preparing CatalogControl. imageOpen CatalogControl.cs source code doing right click on the control and selecting View Code.

Remove all the three methods after the CatalogControl() constructor. The sourcecode should look as the following:

using System;
using System.Collections.Generic;
using System.ComponentModel;
using System.Drawing;
using System.Data;
using System.Text;
using System.Windows.Forms;
using Clarius.UI;

namespace MobilePractices.BasicCatalog
{
public partial class CatalogControl : OrientationAwareControl
{
public CatalogControl()
{
InitializeComponent();
}
}
}

Now, open the Form1.cs code: from Solution Explorer right click on Form1.cs - "View code".

image

Select from line 28 (private void FillComboBox()) to line 128 (up to the end of comboBox1_SelectedIndexChanged) and cut all the selected code (CTRL + X).  Go back to CatalogControl.cs source code, and paste the code after the default constructor within the class (CTRL + V).

Additionally, we need to move the following using clauses:

using System.IO;
using System.Reflection;
and the class member "pictures" which should be now part of the CatalogControl class
List<ShowableDirectory> pictures = new List<ShowableDirectory>();

BuildCollection() and FillComboBox() method calls should be removed from the Form1 constructor and placed as part of a new override OnLoad method in CatalogControl:

protected override void OnLoad(EventArgs e)
{
base.OnLoad(e);
BuildCollection();
FillComboBox();
}

Now it's time to move the menu item click handlers functionality from Form1 to CatalogControl. Both handlers will be now internal functions with no parameters (because in this application they don't need any parameter as part of their logic).

Copy (do not cut) and paste menuItem1_Click and menuItem2_Click into CatalogControl and replace their parameters, names and modifiers to look as following:

internal void SelectPrev()
{
if (comboBox1.SelectedIndex > 0)
comboBox1.SelectedIndex -= 1;
}

internal void SelectNext()
{
if (comboBox1.SelectedIndex < (comboBox1.Items.Count - 1))
comboBox1.SelectedIndex++;
}

These methods will be called from the form menu item click handlers, so we need to make them accessible from the form turning them "internal" instead of "private".


imageFinally, we need to wire up the selected index changed handler from CatalogControl to the corresponding event in the combo box. Go back to CatalogControl designer, select comboBox1 and press the "Events" button:

In "SelectedIndexChanged" select from the drop down list "comboBox1_SelectedIndexChanged" as following:

image 

Save all the files (CTRL + SHIFT + S).

4) Adding an OAC instance to the existing form

To add CatalogControl to the existing form, we need to have it as part of the toolbox. To get it there, just build the solution. Menu Build - Build Solution.

The build should succeed with no errors. If you have any error please check the previous steps to find out what could be different.

Open Form1 in design mode (double click on Form1.cs in Solution Explorer). Remove comboBox1, textBox1 and pictureBox1 from the form (those three controls have been copied to CatalogControl during step 2).

Drag the CatalogControl from "BasicCatalog Components" in the ToolBox to the form:

image

The new control is called CatalogControl1 by default, and that's good enough for our sample. Click on the smart tasks icon at the top right of CatalogControl1 and select Dock in parent container.

image

This step is required for allowing OAC to detect screen size changes.

Go to the source code, and replace menuItem1_Click and menuItem2_Click with the following:

private void menuItem1_Click(object sender, EventArgs e)
{
catalogControl1.SelectPrev();
}

private void menuItem2_Click(object sender, EventArgs e)
{
catalogControl1.SelectNext();
}

Now the handlers in the form are just calling the correspond SelectPrev() or SelectNext() methods in CatalogControl.

We're ready to see the app running! Press F5 ...

The app should behaves in exactly the same way it used to do before all our changes, even with the same disappointing horizontal layout design. Frustrating? no way!... we've just included an OAC in our app so we can now easily build a better horizontal layout.

5) Designing the horizontal layout

Close the application if it still running pressing the OK button.

In Visual Studio, open CatalogControl in design mode by double clicking on it in Solution Explorer.

Be sure that you have CatalogControl selected, if needed please select it from the Properties pane combo box.

We need to rotate the screen, just Right click on any empty area of the designer and select "Rotate".

image

There are several ways to rotate an OAC, you can also change the "Orientation" property from the Properties pane to "Horizontal" or using the "Rotate" command:

image

The designer will change to the "Horizontal" Layout. First thing to do is to change the CatalogControl size to 320x188.

image

The layout looks as in the app when running in a horizontal screen. This is our starting point.

image

Select pictureBox1 and change the Docking property to Right, sizeMode to CenterImage and Size to 160,166 as follows:

image

The layout looks now much better:

image

And that's it! The work is done! Try running the app by pressing F5.

Now you'll see the following behavior when rotating the screen:

imageimage

It's much better! isn't it?

You can download the final source code after completing the four steps from here:

Some extra tips:

imageYou can rotate the emulator using the "Calendar" button at the right of the directional pad.


image You can rotate a Form at design time, from a contextual menu in the Visual Studio designer if you right click on the title bar and select Rotate left or Right. Sometimes this menu fails while showing. In that case you just need to close the form designer and open it again. If your form contains an Orientation Aware Control, it will reflect the orientation change according to the rotation.

Resco will participate in Microsoft Tech Ed EMEA Developers 2008

Microsoft is preparing the start of Tech Ed EMEA Developers 2008 for November 14th in the CCIB Barcelona, Spain. I've just received news from Resco about their participation showing some of their mobile products during the conference.

If you'll be attending, take a look at the press release for further information.

Friday, September 26, 2008

CabWizFixer: Support for files with the same name on Smart Device CAB installers

There is a know bug in cabwiz.exe when your deployment needs several files with the same name in separate folders. This is a typical scenario when you have multiple resource files (i.e. using localization) in a Smart Device Cab Project, but it can also be present when you try to face an app in a generic approach depending on the folders/files structure or just even as a bad coincidence in your app file names. In all cases the cab installer will mess up your deploy copying the same file in all your folders for each group of namesakes.

Let's see an example:

Update: The originally posted 7Wonders sample application has been removed due to copyright issues after asking them about the usage of their material. I replaced that sample with this one:

The Small Catalog Mobile app

This is quite a basic sample, but useful enough, of a good generic approach for a problem. The Problem: We need to implement a Pocket PC app to show a small and simple catalog of a few products. Just a way to show a set of pictures and a quick description of each product. The app should be very simple, and we don't need even to have a database. So, we can just rely on the file directory structure where each subfolder in our app folder will be a new product. The folder name is the product name, and it includes two files named description.txt and picture.jpg for the product description and image correspondingly.

Actually, this approach also makes things easier during the development process. We can build the directory structure in our project as we want it once it's deployed on the device in a sort of WYSIWYG design experience.

 image

You can download the sample solution source code from the following link:

The solution includes two projects: BasicCatalog project itself, and a setup project. If you try to debug or run the solution from VS, it will be deployed and run as expected. But if you try to install the cab generated thru the setup project, the app will show always the same description and picture for all the products. The reason of this behavior is the cabwiz bug described at the beginning of this post. The same picture.jpg and description.txt files have been installed in all the product folders.

CabWizFixer

Here's when CabWizFixer can help us. This is a small tool we made internally based on part of the source code from the Clarius Orientation Aware Control which includes a built-in workaround for the cabwiz issue, a strong requirement for OAC applications as well as it relies on and extends the standard localization infrastructure provided by .NET Compact Framework.

With CabWizFixer, the Basic Catalog installer will work as expected. After install the tool, you just need to rebuild the installer and the new generated cab will install all the right files on the right location.

CabWizFixer is a experimental tool and it's provided "as is" with no warranties whatsoever. If you want to try it, here is the command-line installer:

For uninstall it just launch from a command-line console:

CabWizFixerInstaller.exe /uninstall


I hope this tool makes your life a little bit easier :)

Take care!

Monday, September 1, 2008

Orientation Aware Control 2008 Released!

Just last weekend we shipped Orientation Aware Control 2008, the latest stable version of the popular control for .Net Compact Framework from Clarius, formerly part of the Microsoft Patterns & Practices Mobile Client Software Factory.

You can find it in three different flavors:

  • OAC 2008 Community Edition: A free version targeting small application development, supporting different horizontal and vertical layouts for the default form factor.
  • OAC 2008 Professional Edition: Commercial version of the product. Take a look at the features comparison chart.
  • OAC 2008 Trial Edition: Fully functional Professional Edition that randomly shows a trial message.

Why should I use OAC 2008 over the p&p OAC?

OAC 2008 is an evolution of the original p&p OAC. Beyond some bug fixes and VB.Net and Smartphone support, you can keep in mind:

  • Visual Studio 2008 designer integration. As far as it targets VS 2005, p&p OAC doesn't support VS 2005.
  • .Net CF 3.5 support
  • It still being compatible with VS 2005.
  • Includes SipAwareContainer, a pretty cool panel control which detects the software input panel (SIP) status and resizes itself accordingly.
  • You can store layouts on satellite assemblies for reduced download time and use a tool for create separate .cab installers for each resolution/culture.

Wanna try it? You can go to the downloads page and take a look at it.

If you have previously installed Orientation Aware Control June 2008 RC Trial Edition over both VS2008 and VS2005 on the same machine, you should verify after uninstalling it and before installing OAC 2008 that the following files have been removed from your system:

Program Files\Microsoft Visual Studio 8\Common7\IDE\PrivateAssemblies\Clarius.UI.OrientationAware.Designer.2.0.dll (v.2.0.2.0)
Program Files\Microsoft.NET\SDK\CompactFramework\v2.0\WindowsCE\DesignerMetadata\Clarius.UI.OrientationAware.*.asmmeta.dll

If any of these files remain on your system, please close Visual Studio and delete all of them before installing Orientation Aware Control 2008.

Hope you like the product. Remember to give us your feedback on the OAC Forum.

I'll continue posting about some of the features and usages of the OAC, so stay tuned!

Tuesday, May 6, 2008

Orientation Aware Control June 2008 RC Trial Edition available for download!

Some time ago the best way to deal with screen rotation in your mobile application was to detect it programmatically and re-layout the screen at runtime, moving and resizing the controls and even changing their content manually, or directly showing a different view with a completely different layout according to the new orientation. An easier option was to use anchoring and docking, which could be good enough in a few cases, but not in most of them. This challenge was not easy at all, and that was the reason because many developers decided to directly forget screen rotation and delivery applications that are almost unusable when the screen is rotated.

What about applications which should run on devices with different form factors? Once again, anchoring and docking are not enough. Remember that in a mobile application you should design your UI thinking from the scratch in order to take full advantage of the screen and maximize the user experience.

One of the main advantages of using Visual Studio 2005/2008 and the .Net Compact Framework is the design-time experience which is great for a single form-factor / orientation, but it's almost useless when you need to design a solution thinking on a really outstanding mobile user experience.

When we worked on the Microsoft Patterns & Practices Mobile Client Software Factory, this challenge was part of our focus, and the need for a design-time experience in order to support rotation and multiple form factors was the goal. The former Orientation Aware Control was the first approach towards this goal. It's indeed part of the Mobile Client Software Factory, and by extending the Localization feature of the Visual Studio designer it provides a design-time approach for supporting screen rotation and multiple form-factors for Windows Mobile 5.0 Pocket PC and Visual Studio 2005. It is, in fact, one of the most popular application blocks of the MCSF, and it has changed the way in what .Net Compact Framework developers should deal with screen rotation and multiple form factors support.

Last year, Clarius Consulting released a new and improved Orientation Aware Control including support for Pocket PC 2003 and Windows CE 5.0. It was developed by the same people who worked on the MCSF Orientation Aware Control lead by Daniel Cazzulino. Unfortunately, this version was released before Orcas, and it didn't include any support for Visual Studio 2008, which was one of the most required features for the next version.

I'm glad to announce that we've just published the Orientation Aware Control June 2008 RC Trial Edition!! This is a new preview of the June Release Candidate, fully functional with a trial message at runtime. This version does include Visual Studio 2008 design-time support! and several bug fixes and improvements. It's good to know that this version works with both VS2005 and VS2008, and it includes support for .Net Compact Framework 2.0 and 3.5!

What are you waiting for? Go ahead and download it! Your feedback will be very appreciated!

Tuesday, March 18, 2008

How to allow minimize being in a modal dialog on Pocket PC using the .Net CF

An interesting question came up today at the Mobility Metro train the trainers workshop in London: How can we allow the Pocket PC user to minimize the application even when he is in a modal dialog?

This is a particular requirement received by an attendee, and it was a little bit challenging problem. I did a small spike on this, and this is my suggested approach.

First of all, we cannot use Form.ShowDialog(), because it shows the 'OK' button at the top right corner, and ideally we should keep the standard 'X' smart minimize button there.

The solution is to use Form.Show() and handle the Form.Closed event of the dialog. We also should take care of the dialog Owner property in order to show only one entry on the Running Programs List.

private void menuItem1_Click(object sender, EventArgs e)
{
Dialog dialog = new Dialog();

//Prepare the app to be 'Running Programs Aware'
this.Text = dialog.Text;
dialog.Owner = this;

//Subscribe to the dialog closed event
dialog.Closed += delegate(object s2, EventArgs e2)
{
//Do something when the dialog is closed
label1.Text = string.Format("DialogResult = {0}", dialog.DialogResult.ToString());
//Update the form text back
this.Text = "MainForm";
};
dialog.Show();
}

Here you can find the spike sourcecode:


Sunday, March 9, 2008

Going back to London for Microsoft Mobility Metro 2008 Train The Trainers (TTT)

Well, I'm glad to say that I've been invited to be instructor in the Microsoft Mobility Metro "Train the Trainers" in UK. It will be my second time in London and I'm sure it'll be as great as the previous one was.

This will be a three days mobility training targeting european instructors audience, that will start on March 18th. The agenda includes several topics, starting with Windows Mobile platform concepts, moving thru the tools, managed code for devices, SQL Compact Edition, Optimization and guidance, and an interesting review of what's coming on in mobile development. Hope to see some of you there.

These days are very busy for me, but I'll try to keep blogging. Stay tuned!

Saturday, March 1, 2008

Looking for an OpenFileDialog for Smartphone? Porting the MobilePractices.OpenFileDialogEx from PocketPC to Smartphone

This morning I've ported the MobilePractices.OpenFileDialogEx custom implementation of the OpenFileDialog to smartphone. Strictly, I've ported it to Windows Mobile 6 Standard Edition. And I want to remark that Smartphone doesn't even support the standard OpenFileDialog. If you try to use the standard version a NotSupportedException is raised. So I thought this port should be extremely useful, and it's additionally fully implemented using the .Net Compact Framework (.Net CF).

The port was pretty much straightforward, besides the expected design constrains. It took me exactly 75 minutes. What were the main issues I have during the process? First of all, the need to make it usable in the smartphone platform. It doesn't make sense to have the same structure with one combo box, the list, and the textbox at the bottom. So, my design decision was to leave the list. I know you may have a new smartphone device which has a qwerty keyboard, but I think it still being the simplest option just to browse the file system. Actually I used to do that even in my laptop. And if I keep the textbox, it'll leave less space for the list, and I think that's critical here. Anyway, if you prefer you can bring the textbox back from the pocket pc version.

The second main issue was how to provide the quick go back to any directory on the current path without the combo box. I've decided to implement this using the right menu, the same way File Explorer does.

It looks this way in the Windows Mobile 6 Standard Edition emulator:

image image

Not bad! But it still being just a starting point. There are many features missing which you probably will find critical in your app. As you can probably noticed, the file list is not sorted, there are no InitialDirectory property, and it doesn't cached any directory info to improve the performance during the browsing. Feel free to add any feature you want. The source code is here:

Monday, February 25, 2008

A custom OpenFileDialog implementation that browses the full file system: MobilePractices.OpenFileDialogEx

Doing a spike yesterday I had the need to use OpenFileDialog to browse and select an existing file. The problem was that I placed the files on the device root. And oops! the Windows Mobile implementation of the OpenFileDialog, this is not a .Net Compact Framework limitation, doesn't allow the user to browse the root. Actually, it doesn't allow the user to browse the whole file system, it just let you browse My Documents subfolders and Storage cards. Very bothering in some cases.

Indeed, this is not the first time I have to deal with it. An I thought I should be just one of many developers with the same problem. So I decided to implement a custom OpenFileDialog in c# targeting PocketPC, but easily portable to Smartphone, and customizable and extensible as well. Wow! I think I should have said that first of all, it's a very simple piece of code. And that's its best feature. You can use it as a starting point.

I've not implemented the full Filter feature of the original OpenFileDialog because I think it's not a common scenario on mobile development and it make the UI overcrowded. Instead, the Filter property of my MobilePractices.OpenFileDialogEx implementation, is just a search pattern.

The MobilePractices.OpenFileDialogEx looks this way:

image

The dialog title can be changed as you wish thru the Text property. At the top of the screen, you can see a ComboBox which can be used to quickly go back to an specific folder.

image

Taking a look at the first snapshot you can notice that I'm identifying storage cards with a different icon. To identify a storage card you can check if the FileInfo.Attributes for it are Directory and Temporary.

if ((info.Attributes & (FileAttributes.Directory | FileAttributes.Temporary))
== (FileAttributes.Directory | FileAttributes.Temporary))
return FileSystemKind.StorageCard;

How to continue with this is up to you. You can add an InitialDirectory property, or some way to keep the current path along the application run, or a modified version which allows you to select a directory instead of a file. Or you can take the code and port it to smartphone. Probably I'll do that soon in a new post. Once more, this is just a starting point!


Here you have the source code including a sample application:


Enjoy!

Sunday, February 24, 2008

Working with forms: How to hide the 'x' button or show an 'ok' button instead

A very common question when you start to work with forms and the .Net Compact Framework is how to replace the 'x' button on the title bar with an 'ok' button. By default, a new form is created showing an 'x' button, which is a minimize box on the title bar:

 image

In runtime, it behaves as a minimize button, when the user press this button the form is minimized. Sometimes we prefer to replace this button with an 'ok' button, as in a dialog. This is very easy. Just open the form on design mode and change the MinimizeBox property to false:

image

Now we have a new 'ok' button which will close the form in runtime setting the form DialogResult property to DialogResult.OK

image

If you want to hide both buttons, you can set the ControlBox property of the form to false.

image

Now the form doesn't have any buttons on the title bar.

image

Indeed, all these from properties can be changed programmatically from your code. It's really easy! Isn't it?